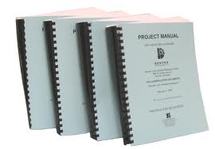
 The economics of design do not allow for the time it takes to write a specification and assemble a project manual.
You have to be extraordinarily well-organized to spend less than one hour on each spec section. There are usually about 50-70 architectural spec sections. Say 60 hours to produce the spec. If the specification represents 5% of the architect's fee (which I think is about right), then the math tells us that at somewhere above a $3,000,000 project, it might be feasible. This quickly rises to $4,000.000 or more if you aren't as efficient as my example. Or if your spec writer is better compensated. See my math below. You can quarrel with my numbers, but the point is that bound specs aren't affordable on a lot of projects, even public ones. 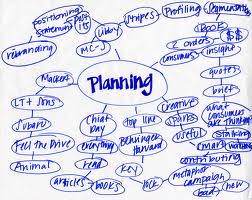 Years ago I stumbled upon a series of inexpensive management booklets published by Dorling Kindersley Limited. The one that was most helpful to me was Project Management. In particular the section on Planning A Project. The booklet describes eight steps that I have used every time I tackle a new project. As designers we have learned to do this, but not in a formal way that always leads to a good plan. Too often we just jump on the first ideas and start designing. Or for non-design projects - just start doing stuff without a clear picture of the whole process.
 The Assembly Concept is a system of categorizing work based on the major components of a building project. This is a useful way of thinking about your project for many purposes - storing typical details, organizing design work, estimating costs, structuring bid packages, planning construction.
The old 16 division (now many more) CSI system with its many sections represents the final work breakdown by individual components. This is helpful when you are looking for completeness or trying to describe, price or specify those components, but in many ways and for many tasks this fine detail is an impediment. For example, a window section in a masonry wall involves Divs 4, 5, 7, 8, 9 for masonry, lintel, flashing, window, and finishes respectively. It is very difficult to think about the window detail in terms of those five divisions, but the detail fits very nicely into one of the Assembly Divisions in this system - Exterior Closure.  I distinctly remember the day it dawned on me that architectural design was a PROCESS. I was still under the care of a mentor (babysitter). It suddenly dawned on me that he was trying to teach me his design process, even though he didn’t present it that way. Then the large wattage bulb went on - everyone has to have a process, or you would never pull it all together.
This episode happened pre-Internet. Trying to find information about the ideal process was a waste of time. The information was not out there. However, at about the exact same moment, 1973, the AIA was preparing their first Document D-200, Project Checklist. Finally the recipe I sought was available. Kind of. 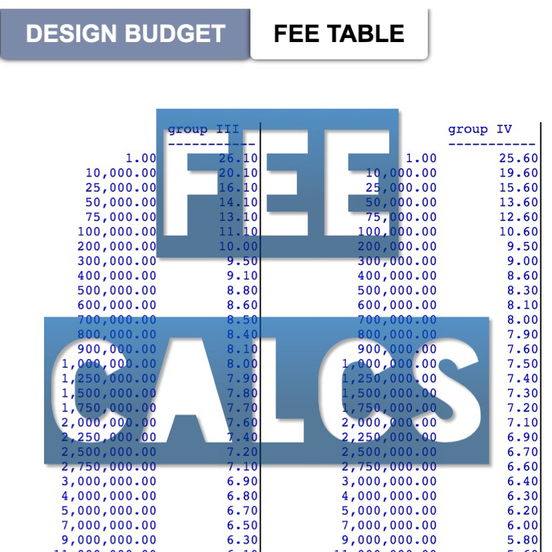
There are probably thousands of ways to estimate design fees. My method has evolved over 30 years into this approach that I am sharing with you.
Estimating design fees is part science and part art (OK...it’s math and guessing). The approach that I use is dictated by the size/complexity of the project, who the competition is, and who the client is. Before we get into the nuts and bolts, let's dispense with 'competition' and 'client' considerations. These two issues affect what you do about the number that you have arrived at as 'the fee'.  I have always liked checklists. Putting a checkmark in the box is (almost) better than completing the task itself. If you can relate to that statement, even a little, this may interest you. I have a checklist of all the tasks required by the typical Construction Documents Phase of architectural design services. Inspiration came from Glenn Wiggins' book, A Manual of Construction Documentation, that Fred Stitt uses in the curriculum of the San Francisco Institute of Architecture. Mr. Wiggins breaks the Construction Documents [CDs] down into four phases and shows what should be tackled in each phase in order to minimize re-work and changes. This book is a real gem. However, the 1989 book applies to hand-drafting, so there are tasks that a CAD-user would not encounter, and also tasks that are a bit out of sequence for CAD use. My idea was to move this checklist system from paper format to digital format, and to update it from a hand drafting guide to a CAD guide. The goal was to extend it the Design Development [DD] phase and the Schematic Design [SD] phase with the end result being a customizable series of checklists that would aid in delegating tasks all through the design process. At the same time omissions and rework/changes would be reduced to a minimum.  About the time I was getting out of college, John Portman, an Atlanta architect, was designing the first Hyatt Hotel with an atrium lobby, pictured above. Unlike most architects, Portman was deeply involved in the development of his projects, not just the design. I was fascinated. And when I came across an article describing all the costs that went into one of his projects, I typed it up. Yep, this was the pre-electronic (caveman) era and electric typewriters were all the rage. Photocopiers were the size of a VW bus and the entire country shared three of them, one per time zone.
The list was really an eye-opener. I had never imagined there were so many things outside of design and construction that went into a project. The construction cost was just one simple line item, and the article explained that construction cost rarely exceeded 2/3 of the total cost. Even though these projects were major commercial undertakings - hotels, merchandise mart, office high-rises - there were many similarities to the schools that I was working on. We didn't consider hardly any of the items in the list, but the Owner had to. Here is the list I typed up. 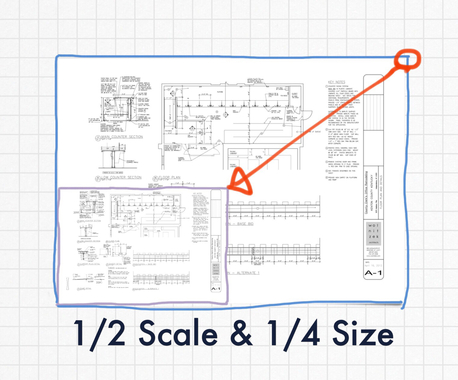 I haven't done any real drawing for ages, but that doesn't keep me from having an opinion about how it should be done. Let's see what you think.
As background you should know that my firm designed non-residential projects, so that is what my reference point is. Occasionally the projects get quite large - hangars, warehouses, etc. Whatever the building size, the sheet size was predetermined - 36" long x 24" wide. No exceptions. However, I could be talked into changing the standard size to 34" x 22". I will explain later. CAD makes this size work with little effort. Provide an overall plan at whatever scale fits the sheet. Provide match lines with generous overlaps to show the plan at the scale that is best. But why you ask. Large sheets are a nightmare on the construction site. "Sails" is the affectionate term given to them. As an aside, this will all seem so quaint when tablets (no doubt waterproof) are ubiquitous on job sites. Even this 36 x 24 size is considered unfriendly by many contractors. Because of the legibility of CAD drawings, contractors often purchase half-scale sets to make life easier. And that is the main driving factor for 36 x 24 sheets: they work great at half scale. The advantages are: 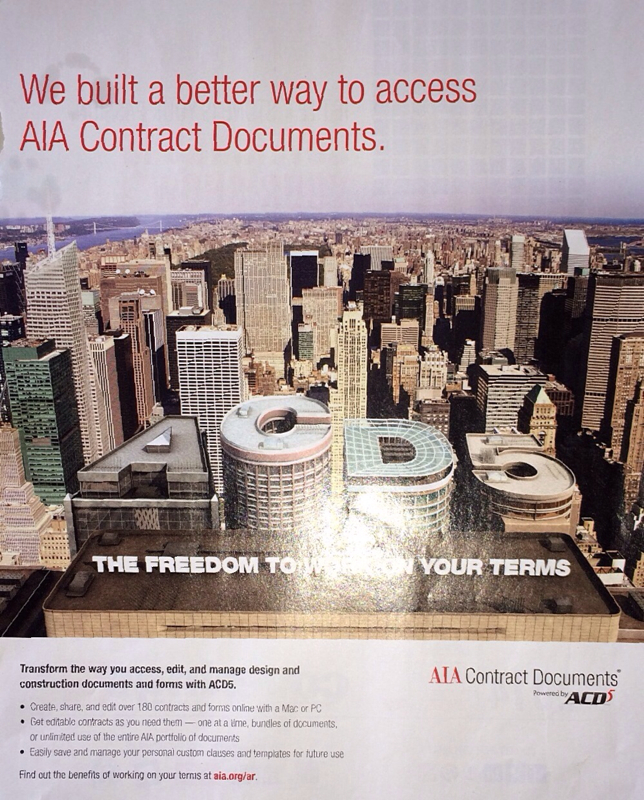 Everyone's heard of AIA Documents. I just saw this ad in a magazine and wondered what the buzz was all about. They are now a browser-based resource rather than a computer-based tool. So you can be anywhere when you work on their contracts and forms.
I think AIA Documents do a good job for all parties, and they have a good reputation as an industry standard. These days they are very easy to use, and the browser-based aspect is very nice. The other thing about AIA Documents is that they cover way more types of situations than you can ever do justice to - all types of construction contracts, change orders, BIM, sustainability, and on and on. There are 180 documents. Many of them would appeal to non-architect design professionals, too. I think they are especially good for public projects. If you get into a legal shoot-out, you don't want to be 'armed' with your home made documents. So how do you get them and how do you use them? Back in the day, you bought them from your blueprinter or the local AIA office; then you filled them out with a typewriter. That was only slightly easier than stone tablets and chisels. Now, as I mentioned above, the AIA Documents are browser-based. In a nutshell:
The service is kind of pricey but there are buying options. And under the terms of an AIA Agreement, the cost of these forms for bidding or construction would normally be a reimbursable expense! At least with the unlimited licenses, maybe the individual document service too, you can save standard clauses for re-use. Here are the purchasing options from most to least expensive. The cost for AIA members would be less. A system for storing our standard and typical drawings has eluded us for years. After all, the real promise of Computer Aided Drafting is saving time by not having to draw the same thing over and over. Everybody wants that. What this has amounted to for us is scavenging details by cut and paste from one project to another. Everyone has their preferred sources that they have worked with in the past. Standardization implies “perfected over time”, but scavenging implies “re-used as is”. There’s a big difference. For the longest time we tried to make the CSI 16 Divisions work as the filing system. This was very unsatisfactory. Then we hit on UNIFORMAT assembly divisions and found that it worked great for the filing system. The only problem was that it took too long popping open file after file looking for appropriate details. Finally we came upon the concept of storing the details of each assembly in its own sheet of drawings. That minimized the search to opening just one file and panning around. This guide below was placed in the folder with all the standard sheets of details as a reference.  Most recently we hit on an improvement to this method of storing and retrieving standard and typical details. And that was to store the details in a template drawing that would actually be used in each project where its contents apply. The process was to simply copy the whole .dwg file to the current project folder; re-name the file; 'viewport' the applicable details; and add custom work as needed.
EXAMPLE: In a template sheet named “A-50b-InteriorDetails” collect all your drywall, masonry, casework details, etc. These are in Model Space. The “b” in the name is a placeholder for the actual sheet number when you know it. If any of these details are ALWAYS used, say a standard drywall partition detail, place it in a viewport in the Sheet view. On the next project that comes along, copy the file to the project folder, ’viewport’ any other details that apply, and then continue as always. You can get a jump on this sheet template system by assembling good examples from past projects to use as your templates. Delete the non-standard stuff and you are ready to go. Add in other standard details as you find or create them. In about a year you will have a very nice addition to your firm’s intellectual property that will continually pay dividends. We haven’t completed the transition from the system shown above in the image to using template drawings. However, we think the templates hold a lot of promise because even a Site Plan, which is always unique, could have a template sheet populated with items that will be needed: north arrow, legend of line types and symbols, paving key, standard boilerplate notes, etc. Are you inspired to start saving time on the mundane stuff so you can spend it on Design?  Most projects are not the work of a single individual. There are many roles that need to be filled, and it is the unusual project where all the roles are filled by one person. Civil, geotechnical, structural, M/E engineering are just a few of the obvious ones. When the project has a Design Team, complexity builds and it is important to think about how you will simplify things for everyone. Below is a checklist of all the issues we have identified. You might have others to add or some to scratch off. In any event, when you kick-off a project, it helps to have a detailed discussion of specific roles and responsibilities. The success of the team depends on it.
ROLES AND RESPONSIBILITIES
OWNER CONSIDERATIONS Similarly, the Design Team should consider a number of issues relating to the Client/Owner. Communicating and working with the owner needs to be managed congruently by the entire team by addressing the following issues:
My experience is that you will never get all of these issues aired; but it is better to try and learn what you can before it bites you. 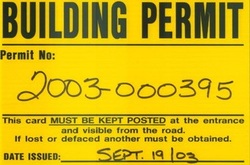 Every project needs a building permit. Jurisdiction doesn't change the code that you must comply with, but it often changes the process of obtaining a building permit. I like to apply for the permit before going out for bids so that any changes that are required by the plan review can be included before the bids are received.
The components of a permit application are jurisdiction, the application paperwork, the printing of sets of drawings / specifications, delivery, and the response to the inevitable corrections letter. Jurisdiction
Building Permit Application
Drawings
Printing
Local Delivery
Corrections Letter Response
You will almost certainly want to modify this process for your circumstances. But the point is to have a plan that you work toward implementing while you are completing the drawings and preparing to go out for bids. We have found in recent years new code-related requirements are cropping up. Two that come to mind are:
Having a documented process makes it easier to hit all the compliance bases without losing your momentum or encountering delays.  When in the course of construction you need to get a price for a change in the Work, here's how. If the project is private, you have choices depending on how formal you feel you need to be. Generally, a formal paper trail is good to have. But if you have a good relationship with the Owner and Contractor, and the change is simple, you might even make a verbal request. An example is changing lay-in ceiling panels from one model to another. Very simple; verbal works. Or perhaps an email would suffice. The email will document the change for future reference. A long email or a letter describing the change with a clarifying sketch can take care of a more complicated change. But if your project is public work, being informal might come back to bite you. So formal is better. I believe the AIA has a form you can use. We dreamt up this form below for a small public project that was, uncharacteristically for us, becoming adversarial. Note that it needs to be clear that you just want a price, and only afterwards will a Change Order be issued (if the price is acceptable). In many instances, you might be chasing someone's dream that doesn't have a direct role in the project - the boss's boss - making the situation a bit political. The formal approach always works, and it takes just a few minutes longer to implement.   The construction of the building isn't (normally) the Architect's responsibility - the General Contractor or Construction Manager has that role. However the Architect does have a role in seeing that what is built meets the documents that he/she has prepared, and that the Owner receives the building that he/she has paid for.
Continuing with the Architect's final tasks during construction... Change Orders Some projects don't have changes, but nearly all do. Humans are fallible. Owner's change their minds. Better ideas come to light. In each case the contract for the construction work needs to be amended by a Change Order. The Change Order states the amount of money for the change, a description of the work it encompasses, any change in project duration, and any background information like details, pricing, and so on. The dollar amount of the Change Order may increase or decrease the Contract Sum. Not surprisingly, increases outnumber decreases by about 20 to 1 in both quantity and amount of money. Owners do not like Change Orders. The Serene Architect avoids Change Orders. The Punch List See this article. When the project is nearly complete, a Punch List is prepared to determine any work needing correction. It is in everyone's interest to correct the work as it proceeds, and the Punch List isn't intended to be a list of what is left to be done. Some Owners want to be involved, most do not. Your engineering consultants should make their own reviews and lists. Once complete, the Punch List is given to the constructor to oversee completion of the items; and the Architect makes one or more re-visits to confirm that the work has been corrected acceptably. Getting subcontractors to return for an hour's worth of work is challenging. But the project can't be closed out until the Punch List is complete. Certificate of Substantial Completion An AIA form is often used to document this milestone, and many contracts require its documentation. Sometimes Substantial Completion is the trigger for retainage (money held back from pay requests) to be reduced or released. If the project is bonded, the constructor's surety must give consent to any change in the amount retained by the Owner. The main prerequisite for declaring that the project is substantially complete is having received a Certificate Of Occupancy from the authority having jurisdiction. The Certificate of Substantial Completion documents the constructor's and the Owner's agreement on when insurance will change hands, when responsibility for security will change over, what remains to be complete and by when, and the start date for warranty periods. Close Out The process of closing out a project is the reason that the end of the Construction Administration Phase is blurry. You and the Owner want to receive a number of documents. The Owner still has to make the final payment to the constructor, and that is the only leverage for ever getting those documents. Here is a listing: CLOSEOUT SUBMITTALS
Warranty Inspection Because many warranties lapse after one year, it is a good idea to make a walk-through at about ten months after Substantial Completion. Some Owner-Architect agreements require it. If not, you might offer it as an additional service or look upon it as a marketing opportunity. Most things that are warranted are not items that you can check visibly. Often you will need to interview those who would know whether anything leaks, the AC works, hardware functions, etc. Having overseen the completion of these warranty items, the project is complete and the Construction Administration Phase ends. Other articles in this series: Construction Administration - Part 1 Construction Administration - Part 2  The construction of the building isn't (normally) the Architect's responsibility - the General Contractor or Construction Manager has that role. However the Architect does have a role in seeing that what is built meets the documents that he/she has prepared, and that the Owner receives the building that he/she has paid for.
Continuing from Part 1 with the Architect's tasks during construction... Submittals Submittals consists of shop drawings that show how the fabricator plans to implement the Architect's drawings. There are also Product Data Sheets and Samples that will be submitted for approval. Within a week or ten days of receiving these submittals, the Architect reviews them, marks them with any deficiencies, and returns them, while retaining a copy for his records. See this article. It is common for the subcontractors to submit documents showing the way they always do things instead of the way you have specified. It gets really messy when you approve a submittal and later realize it is wrong. Attention to detail can save you time in the long run, not to mention the 'egg on your face'. Pay Requests Usually once a month the constructor submits an invoice for the work completed. Nearly everyone uses the AIA forms for this or a spreadsheet formatted in the same way. This Request For Payment should show a logical breakdown of the costs of the project so that it is easy to determine if you agree that each aspect of the work is complete to the extent claimed in the pay request. You might want to visit the site to see if you agree with the breakdown. Allowing the contractors to be paid for more work than they have achieved reduces the only leverage you have for good performance - the money. If you disagree, tell the constructor to change it. Modifying it yourself, while legitimate, invariably creates accounting headaches for the parties involved. They would rather change it. Site Visits Periodic site visits and reports varies in frequency by project and also by the work in progress. For example, earthwork may take months and may be tested by the soils engineers, so a monthly visit is more than enough. Concrete work on the other hand covers any evidence of faulty work as they go and you may want to be present before every pour. I am always curious about what work is expected to be undertaken in the next two weeks in case I want to check on the way it is completed. It is normal to prepare a Field Report about your visit, which notes date, time, weather, who is present, work in progress, your observations and any instructions you may have given to the superintendent. Requests for Information When the constructor has a problem, a formal Request For Information may be used to get direction. The Architect needs to act on these requests as soon as possible. It is not unheard of for the Architect to be sued for delaying the construction. The direction you give must be in accordance with the construction documents. If not, a change may be required to the contract. In Part 3, I will cover: Change Orders, punch list, Certificate of Substantial Completion, close out, and warranty inspection.  The vast majority of the posts that you will find here are about the designing of buildings. The goal of design, of course, isn't a design, but a building. The construction of the building isn't (normally) the Architect's responsibility - the General Contractor or Construction Manager has that role (hereafter referred to as constructor). However the Architect does have a role in seeing that what is built meets the documents that he/she has prepared, and that the Owner receives the building that he/she has paid for.
So here is an overview of the Architect's role during construction. The Construction Administration [CA] Phase usually starts when the constructor receives a signed contract or a Notice To Proceed [NTP]. The end of the CA Phase is often blurry, but is roughly when the Owner occupies the building. No two projects are the same, however the main tasks during this phase are described below. Pre-Construction Meeting As soon after the the constructor is selected as you can arrange, hold a kick-off meeting. This is referred to as the Pre-Construction Meeting. Here is a typical agenda. This is a one-time affair, but you might want to hold similar meetings just before the start of critical parts of the project to make sure everyone is on the same page, e.g. masonry, roofing. In each case the purpose of the meeting is to make sure the contractors understand what is required and expected of them. Progress Meetings Multiple times during construction there should be meetings to discuss progress and any issues/problems that have arisen. The tighter the schedule the more frequent these meetings should be, but they are normally held monthly, bi-weekly or weekly. The constructor is supposed to run these meetings, but it is not unheard of for the Architect or even the Owner to be in charge. The constructor often uses these meetings to remind his subcontractors of safety procedures, establish access to, and use of, the site and similar issues. The main purpose, though, is to discuss progress and what problems need to be overcome to stay on schedule. Sometimes the constructor needs 'help', and it is OK to offer advice; but be careful that you don't dictate ways and means, which are the constructor's responsibility. You could be held responsible for your directions if there are problems. Test Reports Some of the work is tested by a third party, who submits a report on the findings. You will need to review these reports promptly to determine if the work meets the specifications; and, if not, take action to have it corrected. Except for remodeling projects, the soil compaction and concrete strength are normally tested. Masonry mortar and grout, roofing, paving are often tested. The International Building Code requires 'Special Inspections' for many buildings, although the local authorities having jurisdiction often interpret this requirement in vastly different ways. In Part 2 and Part 3 I will cover submittals, pay requests, site visits, RFIs, Change Orders, punch list, Certificate of Substantial Completion, close out, and warranty inspection.  Ages ago I found an article describing when design decisions should be made to minimize re-work. The most interesting thing about the recommendations was how they had been broken down by the same 'assemblies' system that I had seen in RS Means. Later I learned that this was the Uniformat system. What is unique about the Uniformat breakdown of everything that goes into a building is that each division aligns with a whole group of related tasks. To some extent these divisions align with groups of drawing sheets, too. Bottom line: the Uniformat system, especially the older version, aligns with groups of responsibilities that you might want to delegate to team members so they won't be stepping on each others toes, or having a lot of coordination to do. The table below is the way we documented the article to make it concise and accessible. 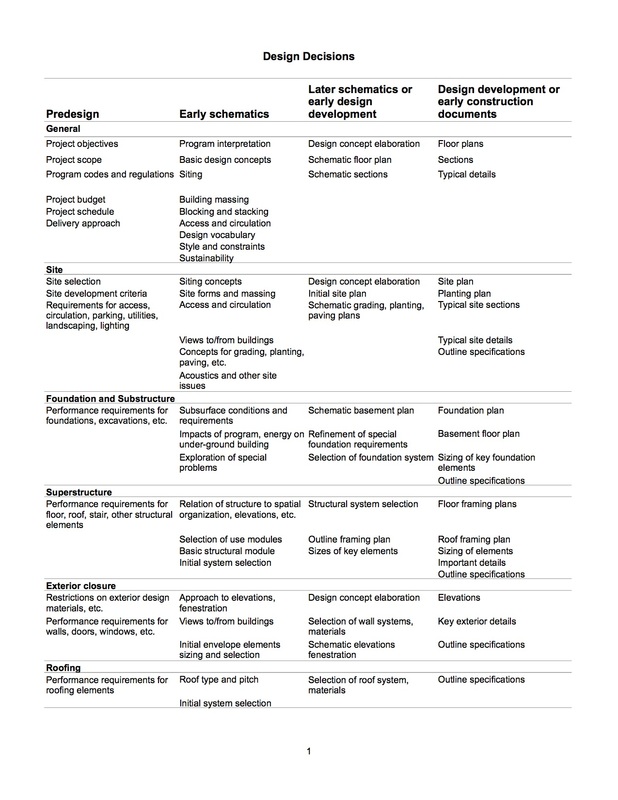 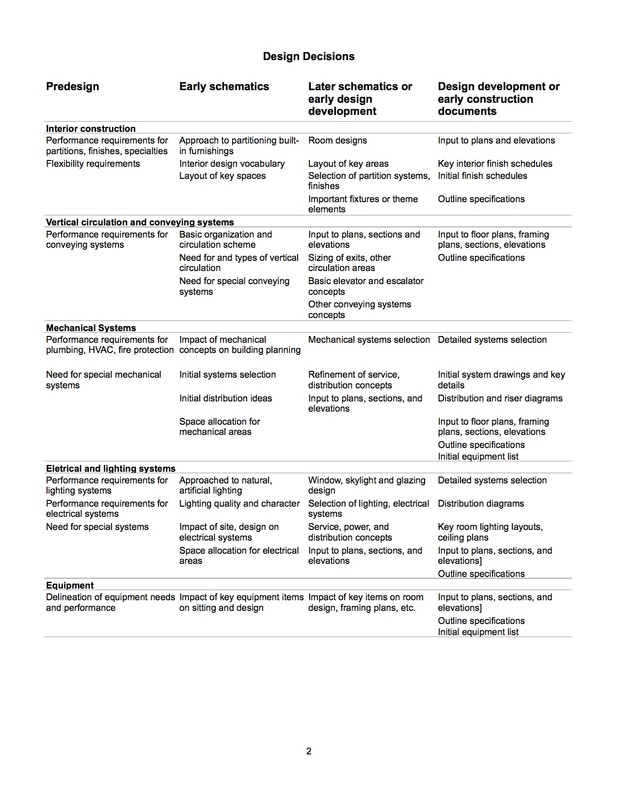 Not every Uniformat division can stand completely alone. Here I have tagged each division with a group letter ID to show which are best to keep together, and also describe the sheets that go with that group of divisions. Of course, coordination among all groups is necessary. However, if speed requires everything to move forward at once, this is a starting place for how you might assign multiple people to the job with a minimum of overlap. Clearly group A has the most work and takes the lead in decision-making. Group A might consist of the project manager and/or principal and the project architect. Group B is very stand-alone, Group C is significant, but might be easily combined with Group D. Group E can stand alone or be folded into Group A. Group E doesn't even exist for one story buildings. A - GENERAL Floor Plans A - FOUNDATIONS AND SUBSTRUCTURE Coordination with in-house or consulting structural engineer A - SUPERSTRUCTURE Coordination with in-house or consulting structural engineer A - INTERIOR CONSTRUCTION Floor Plans, Reflected Ceiling Plans, Partition Types, Room Schedule, Door Schedule and Door Details, Interior Details, Enlarged Plans, Coordination with mechanical and electrical engineers A - EQUIPMENT Schedules ______________________________________________________________________________ B - SITE Site Plan and Site Details, Coordination with civil engineer ______________________________________________________________________________ C - EXTERIOR CLOSURE Wall Sections, Exterior Details, Window Schedule ______________________________________________________________________________ D - ROOFING Roof Plan, Roof Details, Coordination with mechanical engineer ______________________________________________________________________________ E - VERTICAL CIRCULATION AND CONVEYING SYSTEMS Stair Plans, Stair Sections and Details, Elevator Plan, Section and Details, Coordination with structural engineer ______________________________________________________________________________ F - MECHANICAL SYSTEMS by in-house or consulting engineer ______________________________________________________________________________ G - ELECTRICAL AND LIGHTING SYSTEMS by in-house or consulting engineer  Project Delivery Method: What is it?
Project Delivery is the method chosen for the design and construction of your building project. There are over a dozen project delivery methods in common use, and more to come with the advent of true BIM. Fortunately all the methods fall into two main categories - design-bid-build and fast track. (See Part 1.) All the other variations amount to different contracting methods for providing one of these two styles of project delivery. (See Part 2.) It is important to resolve the Project Delivery Method early in the process, because you cannot easily change methods because of existing contracts, fees and relationships. Two Additional Wrinkles Any of these methods can be further complicated by 'Multiple Primes' and 'Work By Owner'. Multiple Primes means that several contractors work directly for the Owner instead of just the General Contractor. Multiple Primes will affect the development of the construction documents and the amount of work required of the architect during construction. Work By Owner is similar. The 'Work By Owner' may be work that the Owner will perform with his own employees or a separately contracted entity. If this work will happen simultaneously with the other construction, there will be coordination issues for the contractor and perhaps coordination with the design work as well. A couple of examples are security and wiring, graphic design and signage, or perhaps interior design and furnishings. One Last Option - 'Bridging' Bridging is a hybrid method invented by Heery and Heery, an Atlanta architectural firm. Bridging maintains many of the best features of the various project delivery methods. Here is how it works. The Architect develops a sophisticated preliminary design based on the Owner's needs and budget. The focus of the design is the Owner's core needs, what is important to the Owner. This design forms the basis for bidding the project to several Design/Build firms, who are urged to use their creativity in delivering a solution to the preliminary design. The Architect assists the Owner in awarding the design/build contract and remains in a consulting role through the final design and construction. The benefits are that the Owner has someone on his team throughout the process, the Architect; and he has one point of responsibility for the final product, the Design/Builder. Conclusion Which method is the best? I am partial to Design-Bid-Build (no surprise) with a contractor hand-selected to provide the work on a cost-plus fee basis. If any part of the project goes over budget, you can work with the contractor to re-design and re-bid. If you have an adequate number of alternate bids up front, which is one of my favorite tactics for bringing a project in on budget, the 're-design and re-bid' actually amounts to just adding the features you can afford from the alternate bids that have been obtained. My next choice is Bridging if the circumstances are right. Bridging works particularly well for a project that is out of town. We have experienced just about every type of Project Delivery. With the right contractor, construction manager or design/builder and with complete and competent design documents any method works well.  Project Delivery Method: What is it?
Project Delivery is the method chosen for the design and construction of your building project. There are over a dozen project delivery methods in common use, and more to come with the advent of true BIM. Fortunately all the methods fall into two main categories - design-bid-build and fast track. See Part 1. All the other variations amount to different contracting methods for providing one of these two styles of project delivery. It is important to resolve the Project Delivery Method early in the process, because you cannot easily change methods because of existing contracts, fees and relationships. The Project Delivery Contract Methods The traditional method of contracting for design and construction is for the Owner to hire an Architect and a Contractor, who is selected through the bidding process. A variation is for the Owner to hire the Contractor based on other criteria than bidding. In this case the Contractor is often paid the cost of the work plus a fee. The design/build method of contracting involves the Owner selecting a design and construction team based on proposals, competition or a preliminary design. The Owner has the benefit of one point of responsibility for both the design and the construction. Because the design is not complete, it is very likely that 'issues' will arise that were not included in the cost. Often this contracting method includes a Guaranteed Maximum Price. What is 'guaranteed', in my opinion, is the Design/Builder's profit. A change in the scope of the project always comes at a price - more money or elimination of something else. The construction management method of contracting for design and construction comes in two flavors. The Construction Manager may be the constructor, and thereby at risk, or he may be an advisor where he is paid a fee. This second flavor makes the Construction Manager similar to the Architect. In either case the Architect may work for the Construction Manager, although this almost never happens when the Construction Manager is an advisor. You will note that some of these project delivery methods are set up to have the Architect working for someone besides the Owner. Be aware that who the Architect works for affects his loyalty. It isn't realistic to expect the Architect to side with the Owner of the project against his client, who he may have an on-going relationship with. Most contractors, not all, would prefer to have the architect work for them so that they can control the architect and his scope of work. Again, be aware. In Part 3 we will look at some additional wrinkles that create hybrid methods.  Project Delivery Method: What is it?
Project Delivery is the method chosen for the design and construction of your building project. There are over a dozen project delivery methods in common use, and more to come with the advent of true BIM. Fortunately all the methods fall into two main categories - design-bid-build and fast track. All the other variations amount to different contracting methods for providing one of these two styles of project delivery. It is important to resolve the Project Delivery Method early in the process, because you cannot easily change methods because of existing contracts, fees and relationships. Design-Bid-Build Design-Bid-Build is the most commonly used method of project delivery. As the name implies you first design the building, then you take bids and finally you build. This is a logical and practical way to approach construction. Things can go wrong, but generally you have control over the cost and quality of the project. Trying to control the schedule, too, is an imperfect proposition. Fast-Track Fast-Track is distinguished from Design-Bid-Build by starting construction before the project is completely designed and bid. In fact the only reason to use Fast-Track is an overwhelming need to complete the project as soon as possible, or at least sooner than it appears that it will otherwise be completed. Fast-Track holds out the promise of being faster, and it usually is. It is generally harder to control cost and quality because they both are often compromised in the interest of quickness. Briefly the Contract Methods that can be used are:
In Part 2 we will look at these different forms of contracts that add complexity to Project Delivery. Conclusions Which category is the best? I am partial to Design-Bid-Build. (Surprised?) However, we have experienced just about every type of Project Delivery; and with the right contractor, construction manager or design/builder and with complete and competent design documents any method works well. 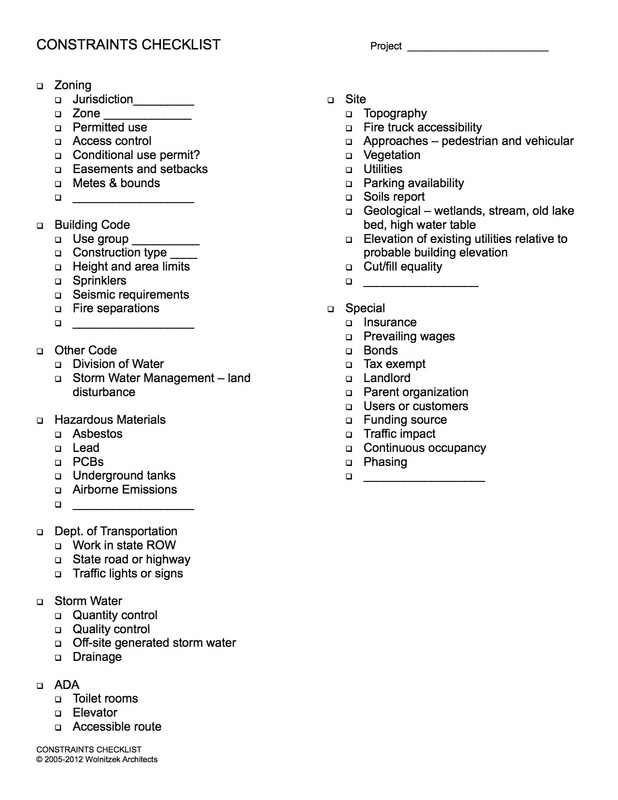 I call them Constraints. You may know them by another name. Obstacles. Restrictions. Hurdles. Red Tape. No matter the project, there are always constraints. There is nothing sexy or exciting about constraints, but you ignore them at your peril. Clients expect you to know about such things. In almost every case, you will have to surrender to constraint's influence eventually, often at great cost for re-working your design to comply.
As the world gets more sophisticated and complicated, the list of potential constraints grows. Building code and zoning used to be about the extent of the constraints you might face. Now the list is at least 15 topics. Besides Building code and zoning, we have added storm water management, hazardous materials, department of transportation, ADA (which now applies to everything), special inspections, and a number of issues that are client-driven but not always obvious. Our Constraints Checklist is downloadable here. To address the growing list of client-specific Constraints, we have also developed a questionnaire template to try and elicit this information before it gets to be a headache. Here is the Questionnaire for download too.  PART THREE - WORKING WITH CONSULTANTS ’If they’re not calling, then they're not working on it.’ That is the first thing to remember. Don't wait for them to call. Make sure they know you expect them to meet the schedule. When you set up the schedule, consider intermediate checkpoints to review progress and facilitate coordination. Here is what we usually do for the design phases, along with some expectations of their phase deliverables. The percent complete refers to the architect's progress. Schematic Design: 75% review - final review. During SD you will need to get out ahead of the consultants. The main thing you need from the consultants during SDs is feedback on adequacy of utilities, their location, systems they foresee, likely ceiling space needed for those systems and budget expectations. Design Development: 40% review - 80% review - final review. During DDs you will need the consultants to start layouts, work out equipment locations, especially those that require space. They need to refine their thinking about the systems that will be used. By the end of the phase, the mechanical and electrical equipment locations should be nailed down with confidence. Main duct sizes and routes should be known. and verified that they fit. Get outline specs or at least cut sheets on the fixtures and fittings that are proposed. Construction Documents: 30% review - 60% review - 90% review - final review. During CDs everything needs to come together for a final solution. For smaller jobs, you might change the reviews to 50-75-95-final because the consultants will find it hard to not just run with it. The review meetings serve two purposes - a chance to get everything discussed and coordinated, and a chance to make sure the consultants will meet the schedule. Particularly during CDs, these review meetings should involve the whole design team. The M/E or the Architect could host the meetings. Invite consulting disciplines to attend on a schedule that allows 30-45 minutes to discuss that discipline. The Architect and M/E project managers would attend all sessions. If the project has a Construction Manager, he would attend the whole meeting as well. For the Bidding phase the only requirement for the consultants is to prepare their items for any addendum. For Construction Administration the minimum that you will need from the consultants is to review the submittals for their discipline and to make two or three site visits with reports. How much more you wish them to do is variable. Some options are: attend progress meetings, more site visits, respond to Requests For Information, review percent complete of their discipline's work for the pay request review. You can find the other Parts of this series here:
Part 1 - Background http://www.architekwiki.com/1/post/2013/04/guidelines-for-working-with-consultants-background.html Part 2 - Hiring http://www.architekwiki.com/1/post/2013/05/guidelines-for-working-with-consultants-hiring.html  PART TWO - HIRING A CONSULTANT When you are sizing up a consulting firm here are few suggested TO-DOs ___ Visit their office. Do you like what you see? ___ What is their head count? Does it seem like a good fit with your firm? ___ Ask how they are organized. Do you like what you hear? ___ What role does the 'mother ship' play if the firm is a branch office? ___ Ask, "What do you do about quality control?" If they have a QC team, that is a good sign. ___ Ask how much contingency you should include for change orders. More than 2% could be a problem. The M/E consultant's attitude to change orders is a good gage of how well their Quality Control works. ___ Do they carry professional liability insurance? ___ How will they schedule their work for you? Does it seem well-thought-out? ___ What is their procedure for estimating? Do they recommend a contingency to cover their accuracy? ___ Ask who you will work with. Assigning your project a project manager is a telling issue. If you will work with each discipline directly, my experience is that they don't communicate internally and you are expected to coordinate their work for them. Depending on your level of experience and available time, this can work; but good firms use a project manager. When you find a firm that you are happy with and want to work with, the next step is to work out a fee and scope of work for the project under consideration. If the fee is higher than you would like, consider negotiating the scope of work they will provide to get the fee in line with your plans. You can find the other Parts of this series here:
Part 1 - Background http://www.architekwiki.com/1/post/2013/04/guidelines-for-working-with-consultants-background.html Part 3 - Working http://www.architekwiki.com/1/post/2013/05/guidelines-for-working-with-consultants-working.html  PART ONE - BACKGROUND My thoughts are directed toward the issues of working with Structural, Civil, and Mechanical-Electrical [M/E] consultants. Other specialties like food service, acoustics, lighting, graphics, landscape have a much more limited scope and finding a firm with a good reputation or who has worked with firms you respect is usually good enough. BTW that concept might be considered a starting point in your search for any consultant. ’Who works for the firms you admire?’ The nature of the beast for M/E firms is that they need 3 times the number of projects as you do to be the same size as you. M/Es that do process engineering, water treatment etc will need a specialized building design department or they may never ’get’ what the project requires. You want someone who does lots of this kind of work so you don't discover they have a blind spot right where you need expertise. Structural and civil firms may have other types of clients so the issue isn't the same. Structural consultants have rarely been an issue. Maybe we have been lucky. The exception is if they are much larger than you. Then there is a tendency to speed ahead of you, which makes for a lot of changes for someone. They will resist being the ones who change because ’we did what you asked us to do’. The problem is that they aren't used to stop-and-start and client whims, because their work is inherently much more straightforward. Civil is similar to structural with the difference that a structural engineer is used to working with some small scale fussy stuff. Small scale to a civil engineer is anything less than a football field in size. You might think about how a curb should terminate; they never will. If this stuff is important to you, you may have to give them the notes or details you want to see on their drawings. Just saying, that’s the tendency. I think the right ratios are 3:1 for the M/E size to your size; and 1:1 for the Civil or Structural size to your size. These are just guidelines and many other things are more important than size. The next post will touch on those issues. You can find the other Parts of this series here:
Part 2 - Hiring http://www.architekwiki.com/1/post/2013/05/guidelines-for-working-with-consultants-hiring.html Part 3 - Working http://www.architekwiki.com/1/post/2013/05/guidelines-for-working-with-consultants-working.html  Task checklists serve a couple of purposes. First they tell you what needs to be done to complete the work of a phase of design. They are a tool for managing the work, especially delegation. And finally having a checklist goes a long way to achieving quality control.
The downloadable example is a tool that we have been refining for years. Your view of the process of design for each phase will probably be different, so you will want to add and delete tasks to suit your situation. Here is how we have used it. The columns are pretty self-explanatory except those grouped under “ROLES”. These are the initials of staff members. We sometimes used a check mark to show who was assigned to the task and occasionally the hours budgeted for the task. We found it very time-consuming to estimate a fee using this much breakdown. Invariably the estimated time was “worst case”. If you are competing with another firm, it just isn’t helpful to assume the worst. Nevertheless estimating fees is another use of the checklists. The grouping of rows for the top four groups is how we think about those tasks. You will probably see these differently. Starting with “SITE” these groupings come from Uniformat. These groupings of tasks form nearly perfect areas of work that can be assigned to a person or team with a minimum of overlap with the work of others. This is very handy when you are on deadline. Everyone can concentrate on their work without “wasting” time coordinating. The non-design phases do not have these design groupings. The Mechanical and Electrical groupings of tasks represent what we wanted from our engineering consultants at each phase. This of course was rarely in synch with their idea of what they should be doing, but it was a least a 'plan' to discuss. The tasks in this series of phase checklists could be broken down much more than shown here. A more detailed breakdown is helpful for less experienced staff, but it is overkill for more experienced staff. You will have to decide what works best for your organization. |


x
Archives
February 2024
Categories
All
|


Architekwiki | Architect's Resource | Greater Cincinnati
© 2012-2022 Architekwiki
© 2012-2022 Architekwiki