 I got the opportunity to design some school buildings right out of college. They were fairly large projects taking six months to a year for the design phases. There was lots of time to recover from missteps. After a couple of these I got an admin building for a small school district. By comparison this was a three-bedroom house in scale. Before I had a handle on what the project would entail, I started focusing on the entrance and how I wanted that to work. After a day or two, the question came. "What the hell are you doing?" I explained about the importance (to me) of the entrance. "Do you even know if this is going to be 1-story or two? Does it fit the site?" Well, I got right on those issues and plenty more. I was ignoring the big picture and getting right into design, the wrong part of the design. About that time I became very interested in the PROCESS of design and was always noting-down any clues I could find about 'how it was done'. Years later I realized that there is a Planning Phase that precedes the Design Phase. This was opaque to me while we were doing public schools because we always received a list of spaces and allowable square footage. It turns out that many other public clients and nearly all private ones are oblivious to planning, or programming as it is usually called. Well I like to plan before I design, but in a different sense. If you think of a building design as the project, I think you still need to do some planning about how you are going to do the design. I've posted about this before in a rudimentary way. Here is where I shared the 8 Steps in Planning a Project. 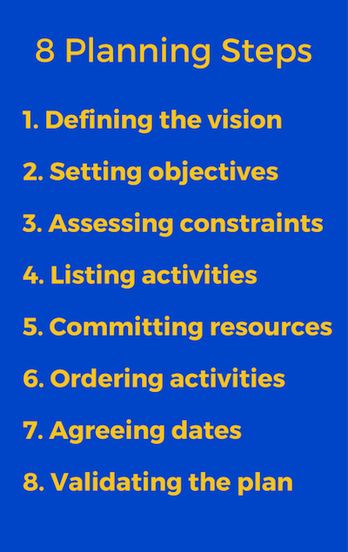 I have used these 8 Steps so often that I have made them a 'shortcut' in several apps so I don't waste time looking for them. (I hate to memorize.) Just this morning I copied them into a blank note and started working through the organization of a new potential venture. When it comes to design projects, I found that they are both complicated enough and standard enough that I can get some real use out of this worksheet below. 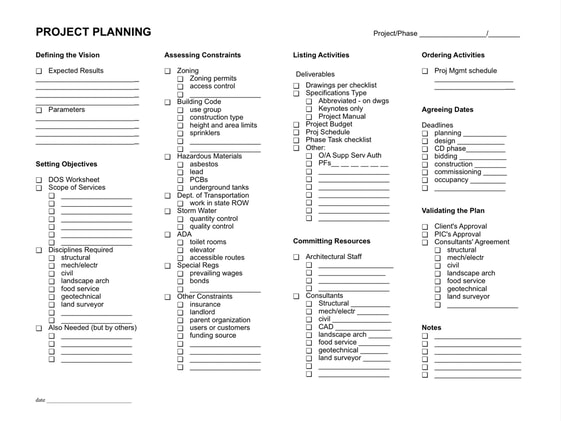 I find that one or two passes over the worksheet, spread out over a day or so, is all it takes to get the project plan pretty well documented. Say an hour or two of time spent thinking, discussing, and filling in the blanks. This doesn't have to be 'pretty' so I usually mark up a print-out, but you could just as easily use a PDF editor on a laptop or tablet. THE MAIN REASON to do this at all is that being aware of the big picture and where you plan to go will save you days of re-work over the course of the project. I read an informal study done by Fred Stitt (I think) years ago. The intent was to determine how much time can be saved by efficient drafting/drawing/CAD methodologies. The result: not that much. It turns out that only 20% of the time spent on the typical project is drafting/drawing/CAD. The rest, the vast majority, is design, decision-making and revising. So it is more valuable to save time doing those activities. An interesting side effect is that processes that require less re-work also lead to better end results because fewer compromises slip in. So Planning is a quality assurance tool as well. Since I developed the worksheet for my own use, it isn't completely self-explanatory. So I will correct some of that here with a few comments arranged by the 8 Steps. Defining the vision. Expected Results: the main goals of the project Parameters: the guidelines to live within, like budget, say. Setting objectives. The DOS Worksheet is an exercise where you think through the Dangers, Opportunities and Strengths. Basically a SWOT analysis. I learned the DOS version from The Strategic Coach. A key part of this is asking the client, "At the conclusion of this project, what has to happen for you to consider it a success?" The answer becomes a key objective. The other items are pretty standard. Assessing constraints. These are potential obstacles. When we tried to figure out what consistently took longer than it should on every project, 80% of the issues fell into this category. The only solution we found was to come up with a strategy for dealing with the issues as soon as possible before they could become problems. Listing activities. This often required the back side of the sheet. You will have your own list. Drawings per checklist: this is a master list of deliverables Phase Task checklist: this is our list of standard stuff to remember to do O/A Supp Serv Auth: this is our Supplemental Service Authorization form, which gets the repetitive blanks filled in to become a project master PFs: these are Project Forms that provide checklists for everything from documenting the official name of the project to what and where was archived at the conclusion of the project Committing resources. This is assigning staff and deciding which consultants will be needed and documenting who they will be. Ordering activities. This is simply putting the 'Listing activities' items in some sensible order. I often used Microsoft Project for this. Agreeing dates. If you use MS Project, you end up with the timeline for the project; and sharing it with the client and design team gets at least tentative agreement on the project schedule. Estimating durations accurately is the real key to not having the project run long in the client's eyes. Validating the plan. This is our standard list of people, stakeholders, that we wanted to be informed of the 'Plan' for the project. PIC is Principal In Charge. Honestly this last step was never very formal. It amounted to talking about the schedule and any issues that popped up during the exercise. So the 'take away' from all this is a new appreciation for how planning a project creates value. You will be more effective, I guarantee it. (in my best Men's Warehouse voice) By the way, you can get your own worksheet here.  Comments are closed.
|


x
Archives
February 2024
Categories
All
|


Architekwiki | Architect's Resource | Greater Cincinnati
© 2012-2022 Architekwiki
© 2012-2022 Architekwiki